A hearing aid is an amazing piece of technology that can help you regain your quality of life. However, it’s only going to work at top capacity if it’s cleaned and maintained on a regular basis.
The good news is that you can clean your hearing aids yourself at home, without having to take them to a professional. Cleaning hearing aids isn’t difficult and shouldn’t take much time. The important thing to remember is that you need to do it on a daily basis to prevent clogging, moisture problems, and internal/external damage.
Why Do You Need to Clean Your Hearing Aids?
Hearing aids are made of tiny electronic components that need to stay clean and dry in order to work properly. Unfortunately, because hearing aids are typically used daily, these high-tech components are susceptible to all kinds of damage, both internal and external.
The outer part of your hearing aid is constantly exposed to dust, dirt, and other particles in the air. Internally, hearing aids are susceptible to damage from accumulated earwax and moisture. Earwax can be especially destructive, as it can clog your hearing aid and prevent it from working properly.
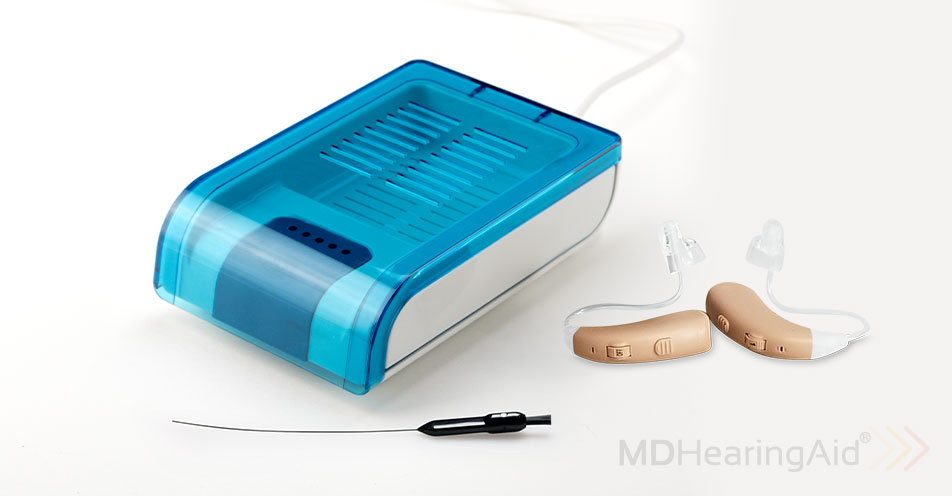
Cleaning Hearing Aids: What You'll Need
Before starting any project, you need the proper tools. You can find a variety of cleaning tools online that are specially designed to help you clean those hard-to-reach areas without damaging them. Here are some of the items you’ll need:
- Soft, dry cloth such as a microfiber cloth
- Soft-bristle toothbrush or a hearing aid brush
- Specially designed wax pick or wire
Tip: There are convenient, all-in-one multi-tools readily available online that include both a hearing aid brush and wax wire. It’s worthwhile for every hearing aid owner to have at least one of these.
Avoid using cleaning solutions on hearing aids because the chemicals can damage the components. Plus, it’s dangerous to put harsh chemicals anywhere near your ear. Whenever it’s necessary to dampen your cleaning cloth, you should use regular, clean water with no soaps or additives.
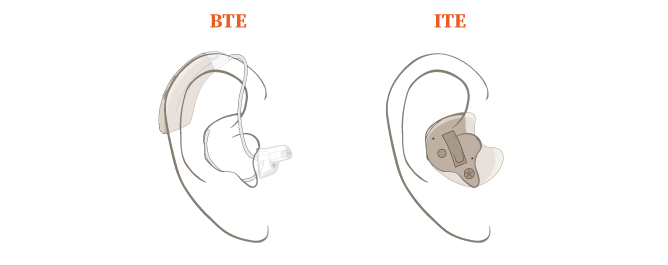
Types of Hearing Aids
There are essentially two common types of hearing aids: ITE (in the ear) and BTE (behind the ear). Because of their placement, they’re susceptible to different types of dirt build-up and need to be cleaned accordingly.
Whichever type of hearing aid you have, you’ll want to place a clean, plain-colored cloth on the table where you’ll do your cleaning. This way, you’ll be able to see any tiny components, such as ear tips or batteries, that might otherwise get lost.
Here’s a step-by-step guide to cleaning hearing aids of both types:
Cleaning ITE Hearing Aids
1. Carefully inspect your hearing aid for any wax buildup, debris, foreign objects, or moisture.
2. Concentrate on all the openings (the microphone ports, speaker, battery door, and air vents) in your hearing aid and the areas around the mechanical controls (volume control and program button). Using a hearing aid brush, or soft-bristle toothbrush, gently brush in and around these opening areas. Focus especially on removing any accumulated earwax. By brushing carefully, you’ll be able to remove or loosen much of the wax or debris.
Important tip: While brushing, be sure to hold the hearing aid downward so that the loosened particles of debris will fall on the table, and not back inside the hearing aid.
3. After brushing, use the wax pick to remove any wax or debris from the air vents. Don’t use the pick near the microphone or receiver areas.
4. Next, open the battery compartment, remove the batteries, and go over everything gently with the brush.
5. Once you’ve finished, you can clean the outer case by polishing it with a soft dry cloth. If the case is soiled, you can slightly dampen the cloth to remove the grime.
Cleaning BTE Hearing Aids
1. Carefully inspect the hearing aid and ear tip for any wax buildup, debris, foreign objects, or moisture.
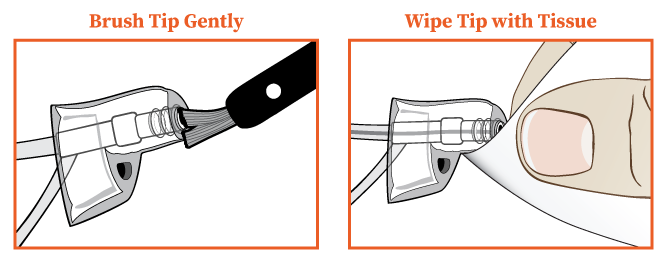
2. Before cleaning the ear tip, remove it from the tubing.
3. Wipe the ear tip with a soft cloth (it can be dry or damp). You can remove debris from the inner tube with either a wax pick or a cleaning wire.
Ear tips can stain and even develop an odor over time. While this is unavoidable, they’ll stay in much better condition if you clean them weekly. An offensively strong odor might indicate an ear infection, so check with your doctor if you notice this. Ear tips should be changed regularly as suggested by your hearing aid manufacturer.
4. Proceed to clean the hearing aid mechanism in the way you would clean an ITE hearing aid (explained above).
For both types of hearing aids, after completing your nighttime cleaning be sure to remove the batteries and keep the battery compartment open overnight. This allows the compartment to air out and dry completely.
Quick Spot Cleaning
For a quick on-the-spot cleaning during the day, you can give the case a simple rubdown with a soft, dry cloth. It’s a good idea to carry one or two cloths with you whenever you’re away from home, in case your hearing aid needs a quick clean. If there’s a sudden gust of dust or dirt, or a surprise rainstorm, you’ll want to give your hearing aids a quick polish so they’re clean and dry.
One more tip: Remember to clean your hearing aids once a day. The best time to clean them is at night before bedtime. This way, there’s ample time for them to dry out before you wear them again. Find a dedicated place—such as your nightstand—to put them every night so you won’t lose them. Never put your hearing aids near a sink—it’s too easy to lose them down the drain—and never place them where they can be reached by your dog or cat. Likewise, they can also get accidentally splashed with water, soap, shampoo, or other solutions that can ruin them.
Important tips to remember before and after cleaning:
- Always use a soft cloth, as a rougher weave might scratch or damage your hearing aid’s delicate components.
- When inserting your hearing aid, make sure your ears are clean and dry.
- Hair sprays, gels, and cosmetics can soil and damage your hearing aid. Try to make a habit of removing your hearing aids before applying these substances.
- Remove your hearing aids before showering, bathing, or swimming.
- Always wash your hands before inserting or removing your hearing aid. Even if your hands look clean, the oils in your fingers could soil and eventually clog the mechanism.
- Check your hearing aid each day to ensure that it’s clean and free of foreign objects.
- Never use pointed items (such as sewing implements) to clean hearing aids.
Hearing Aid Troubleshooting — And How Cleaning Helps
According to the experts at Johns Hopkins, the most common cause of diminished sound in a hearing aid is earwax or debris. Wax or dirt can cause a hearing aid to sound muted, or even dead. Likewise, excess moisture can cause your hearing aid to feel slippery, so it’s essential to keep your hearing aids dry during daily wear. If moisture continues to be an issue, you might want to invest in a hearing aid dehumidifier or dry box for your nightstand.
Earwax and dirt can also prevent your hearing aid from turning on properly. This can happen when the tubing or tip becomes blocked by debris, which you can easily remove with your cleaning tool. Likewise, itchy and sore ears might indicate an accumulation of earwax, either in your ear canal or your hearing aid. Hearing aid wax guards, which are small screens that fit inside, can do wonders for preventing wax buildup.
Even with daily cleaning, it’s a good idea to have your hearing aids cleaned by a professional approximately every six months. A professional has the tools and know-how to deep-clean the delicate internal mechanism, no matter what brand of hearing aid you use.
If you’ve been good at cleaning and maintaining your hearing aids and hearing problems still persist, you might want to visit a local hearing clinic. Likewise, you can also access this free online hearing test to make sure that your hearing—or your hearing aid—is working properly and consistently.
Your hearing aid isn’t just a financial investment—it’s also an investment in your daily living. By maintaining and cleaning your hearing aids regularly, you’re ensuring that they’ll continue to improve your hearing—and your quality of life—for years to come.
Check your hearing for free and get your results instantly.
TAKE ONLINE HEARING TEST